System Specs
CPU : Hitachi SH-4 128-bit RISC CPU (200 MHz 360 MIPS / 1.4 GFLOPS)
Graphic Engine : PowerVR 2 (PVR2DC)
Sound Engine : ARM7 Yamaha AICA 45 MHZ (with internal 32-bit RISC CPU, 64 channel ADPCM)
Main Ram : 32 megs
Main Memory : 32 MByte
Graphic Memory : 16 MByte
Sound Memory : 8 MByte
Media : ROM Board (maximum size of 172MBytes) / GD-Rom
Simultaneous Number of Colors : Approx. 16,770,000 (24bits)
Polygons : 2.5 Million polys/sec
Rendering Speed : 500 M pixel/sec
Additional Features : Bump Mapping, Fog, Alpha-Bending (transparency), Mip Mapping (polygon-texture auto switch),
Tri-Linear Filtering, Anti-Aliasing, Environment Mapping, and Specular Effect.
Known games on Naomi hardware : 64+
NAOMI (New Arcade Operation Machine Idea) also Japanese for beauty above all else.
Notice that Naomi has twice the amount of main memory and graphics memory that Dreamcast has, so ports from Naomi
to DC may involve more conversion time. Also note that the Naomi board has four times the sound memory of the Dreamcast,
and the reason for this is because the Naomi board is’nt meant to spool redbook audio from the GD-ROM drive.
The Naomi architecture is very flexible in that a cabinet can have anywhere from 1 to 16 boards. A multi board system
would operate in parallel increasing the power of the system tremendously! Theoritically a 16 board Naomi system could do
(16 x 3.5 mpps) = 56 million polygons per second maximum! Realistically it would most likely be around 20 to 30 mpps.
Then of course there is also the issue of the CPU being capable of driving all of this hardware.
![]()
The NAOMI 2 (New Arcade Operation Machine Idea) also Japanese for beauty above all else.
CPU : SH-4 128-bit RISC CPU (200 MHz 360 MIPS / 1.4 GFLOPS)
Graphic Engine : 2 x PowerVR 2 (PVR2DC-CLX2) GPU’s – (under the fans)
Geometry Processor : Custom Videologic T+L chip « Elan » (100mhz) – (Under Heatsink)
Sound Engine : ARM7 Yamaha AICA 45 MHZ (with internal 32-bit RISC CPU, 64 channel ADPCM)
Main Memory : 32 MByte 100Mhz SDRAM
Graphic Memory : 32 MByte
Model Data Memory : 32MByte
Sound Memory : 8 MByte
Media : ROM Board / GD-Rom
Simultaneous Number of Colors : Approx. 16,770,000 (24bits)
Polygons : 10 Million polys/sec with 6 light sources
Rendering Speed : 2000 Mpixels/sec (unrealistic max, assumes overdraw of 10x which nothing uses)
Additional Features : Bump Mapping, Multiple Fog Modes, 8-bit Alpha Blending (256 levels of transparency), Mip Mapping
(polygon-texture auto switch), Tri-Linear Filtering, Super Sampling for Full Scene Anti-Aliasing, Environment Mapping,
and Specular Effect.
Compatibility : Fully backwards compatible with all Naomi and GD-Rom games.Notice that Naomi 2 has four time the
amount of main memory and graphics memory that Dreamcast has,
and twice that of the naomi so ports from Naomi to Dreamcast may involve more conversion time and a great loss of texture
detail. Also note that the Naomi2 board has four times the sound memory of the Dreamcast, and the reason for this is because
the Naomi board isn’t meant to spool redbook audio from the GD-ROM drive.
Naomi Pinout
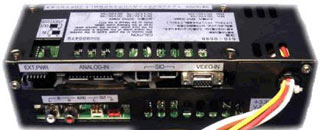
I/O Converters
The I/O converter converts the Naomi’s output (JVS) into the Jamma standard. This is the device that lets you play Naomi games in your Standard Jamma cab. There are several different types of converters available, and they are described in detail below.
1. Capcom I/O Jamma Converter
The Capcom I/O converter converts the NAOMI’s output to JAMMA. This is by far the BEST NAOMI converter out there. It does not require a separate power supply or audio amp like the Sega model. It also has a CPS2 kick harness plug, so you can easily play 6 button games in your JAMMA cab. The only drawback is that you will need the Sega power supply to play Naomi GD-Rom games. If you have a Naomi 2 motherboard, you will not need the Sega power supply, see the Naomi 2 section below for important information on this.
2. Sega I/O Jamma Converter
The Sega I/O converter converts the NAOMI’s output to JAMMA. It requires a separate power supply and an audio amp.
3. Sega Ver. 2 I/O Jamma Converter
Updated Sega I/O Converter. It is ver similar to the Capcom converter, as it also converts audio and power. These units are harder to come by, they were probably made late in the Naomi’s life.
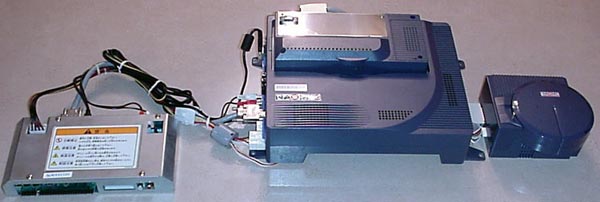
Naomi 1 Gd Rom Setup
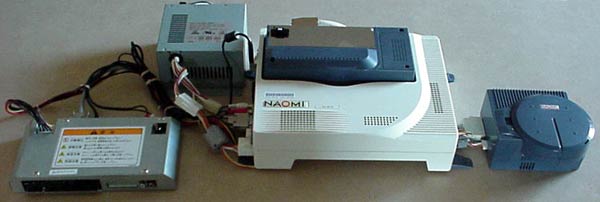
The Naomi 1 has the option of adding a Gd-Rom upgrade unit to it.
The Gd-Rom setup consists of the following things:
Naomi 1 motherboard
I/O Converter (for Jamma Cabs)
Dimm Board
Gd-Rom drive
Sega power supply.
It is mentioned earlier that when using the Capcom I/O, you do not need a separate power supply. This is NOT true when using the GD-Rom upgrade. The I/O converter does not supply the N1 motherboard and the gd-rom unit with enough power, due to slight internal power management differences between N1 & N2.
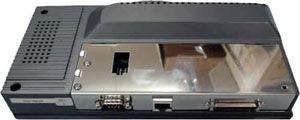
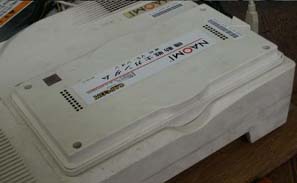
Dimm Module
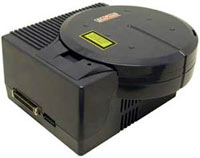
Gd-Rom Drive
Naomi 2 Gd Rom Setup
The setup is basically the same, except you might not need the extra Sega power supply if using a Capcom converter. If you turn up the +5v on your power supply all the way (normally 5.8v will be required, some older PSU’s may only go upto 5.2v), it will usually work without the Sega power supply, but may cause long term damage, always try to use a separate PSU if you can.
Power Supplys
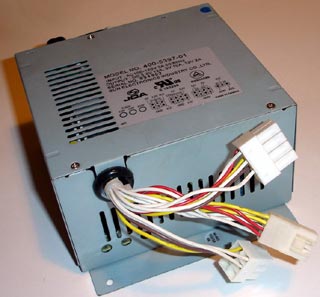
The Sega psu, it has a 5v & 3.3v adjustable screw
The Naomi needs the following voltages: +3.3, +5, +12. The standard Jamma cab power supply doesnt have the 3.3v. There are 2 ways to get the required voltage. The first option is to get the Capcom I/O. The Capcom I/O adaptor outputs a 3.3v line strong enough for the Naomi system. If you are using a GD rom unit on a Naomi 1 motherboard, you will need the Sega power supply to provide power for the Gd Rom drive. If you have a Naomi 2 motherboard, you may or may not need this second power supply for the Gd rom, it just depends on your cab. The second option is to get the Sega power supply. You will need this anyway if you will be running a Gd Rom unit on a Naomi 1 motherboard. There is also a power supply for the stand-alone audio amp, which is mentioned Here.
Linking Motherboards
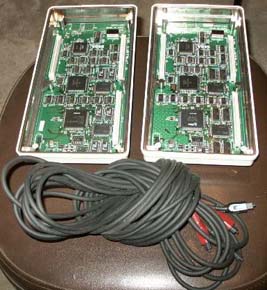
The Naomi has the abality to link motherboards together, for larger multiplayer games. You need these items to link your motherboards together:
Communication Board and fiber optic cables
Attaching the Communication Board
You need a communication board for each Naomi motherboard that you wll be linking. You plug the communication board into the slot where the Naomi Rom usely attaches. You then plug your linkable Naomi game into the top of the communication board.
Attaching the fiber Optic Cables
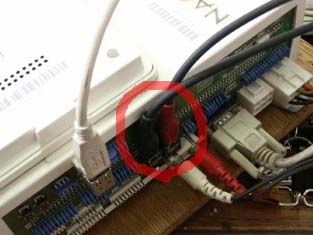
The fiber optic cables plug into the F-O ports on the front of the Naomi motherboard.
Here is a more detailed diagram on how to connect the F-O cables:
Audio Amps
The Naomi’s audio output is un-amped stereo via 2 RCA jacks on the front. The Capcom I/O converter converts the audio source into the Jamma standard, as well as an amplified dual RCA connection.
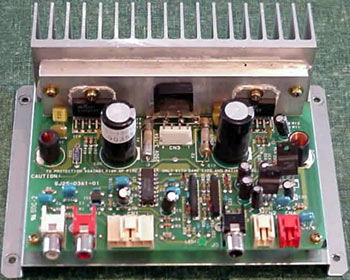
The Sega I/O does not have a built-in amp, therefore Sega produced a stand-alone amp for the Naomi. It requires a seperate power supply that is used only for the amp.
Sega’s stand-alone audio amp. power supply not shown
Arcade Cabinets
There are many good choices for arcade cabinets for a Naomi setup, shown below are some of the popular choices.
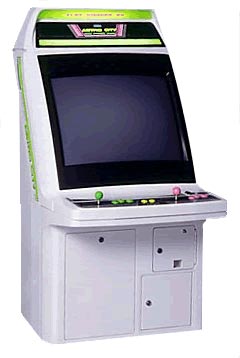
1. Naomi Universal
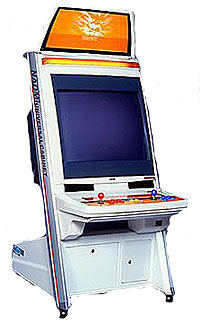
This is the best cab for the Naomi. It is Jamma 2 (JVS) standard, and has a sleek and stylish form. It uses the standard Jpn control panel, so interchanging panels is very easy.
2. Naomi Net City
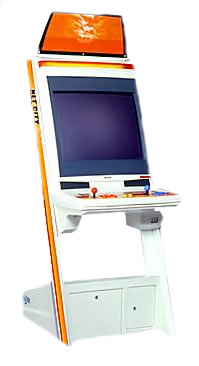
With added net support.
JVS interface.
3. Capcom Mini-Cute
Ideal space-saving cab.
Jamma interface.
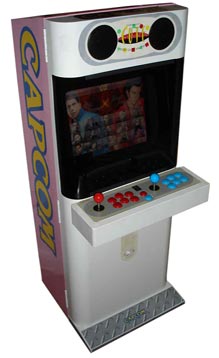
4. Capcom Impress

Big brother of the Mini-cute.
Jamma interface.
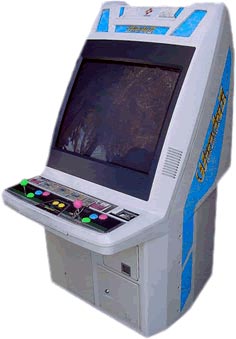
5. Sega Astro City
The original badboy.
Jamma interface.
6. Windy City 2
The classic Konami cab returns this time with a modern JVS interface instead of Jamma, which was found on the previous Windy.
Control Panels
Many of the Naomi’s games require special controls, therefore there are many different control panels out there for the corresponding games. If it is a newer Japanese cabinet or a Naomi universal cabinet, then the control panels are easily changed. All the control panels are the same size and will easily install into any cabinet mentioned earlier.
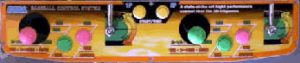
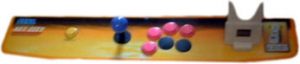
Some Naomi games can be played with Dreamcast controllers through a special port on some Capcom control panels. You can also load saves and characters from the VMU to the arcade game.